

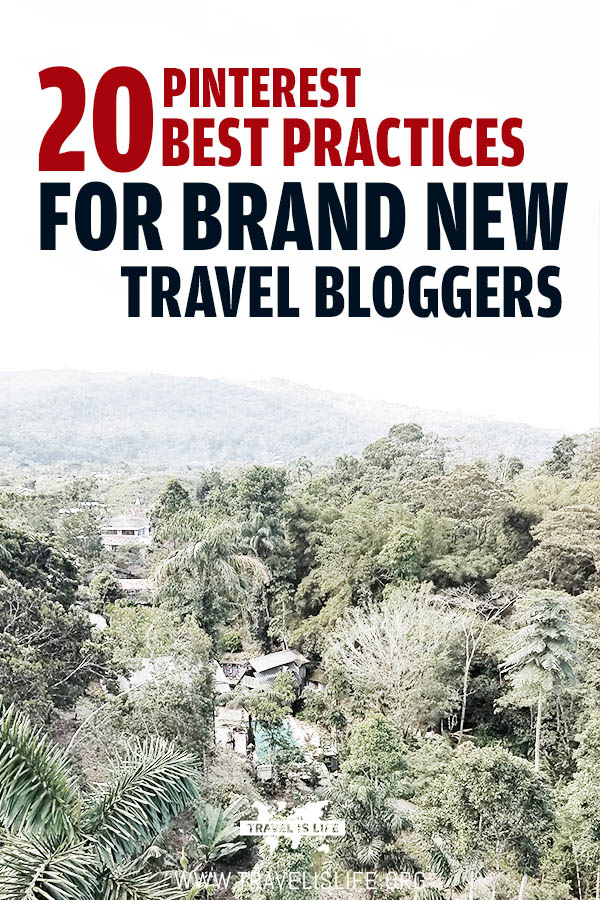
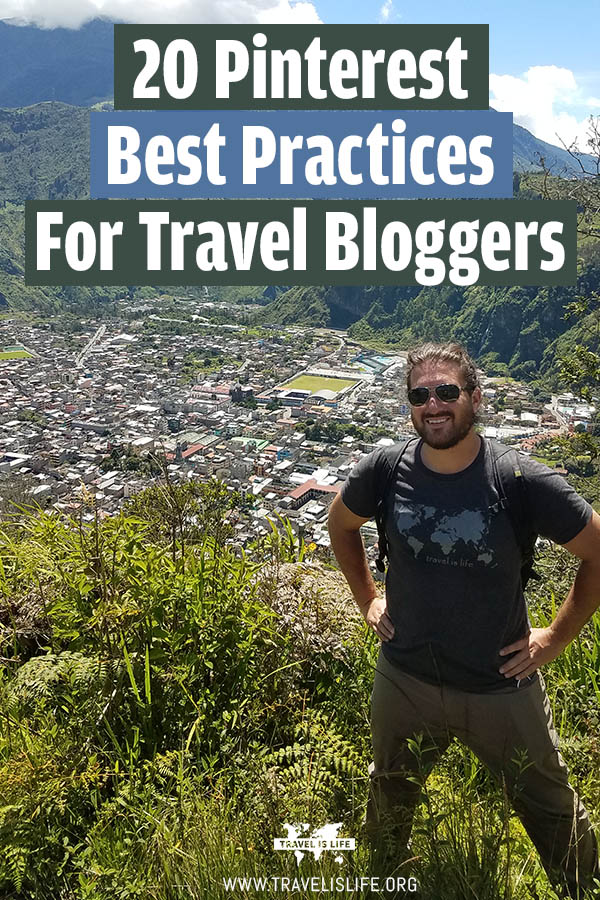
Today's post will teach travel bloggers who are brand new to Pinterest how to adopt excellent Pinterest etiquette and build a successful Pinterest presence that will generate thousands of visitors each month to your website.
Last week a travel blogger named Amber from The Pocket Atlas joined the Travel is Life Creators (our private group of professional travel bloggers, vloggers, and influencers) and she was admittedly brand new to Pinterest. Check out her profile at the time of writing this post:
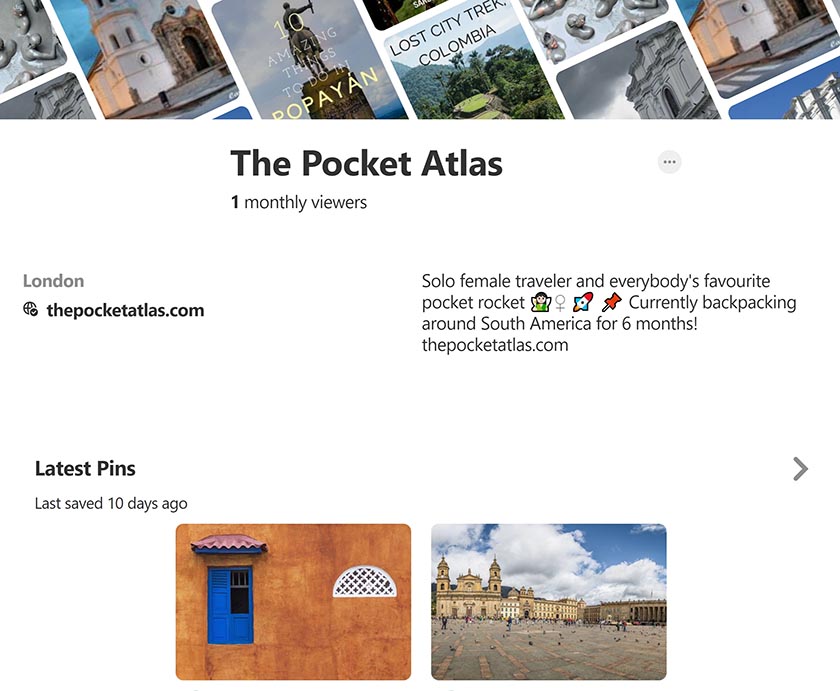
She's legitimately at square one with building her Pinterest presence and asked me for advice on how to get started. Back in November 2017, I wrote an article called How To Market Your Travel Blog on Pinterest which outlined my process, but that article is a bit advanced for someone just starting out, and it doesn't cover the basics – it assumes the reader already has a Pinterest foundation. Today's article assumes nothing! Consider it a Beginner's Guide to Pinterest for Travel Bloggers who are brand new to Pinterest. It's written for Amber and for anyone else at the early stages who don't know what to do first.
✈ Pinterest Profiles: Best Practices
Let's start with information about creating your profile to ensure that all these initial steps are complete. This section will help ensure that your profile is ready to be discovered and that your website is properly associated with your Pinterest account.
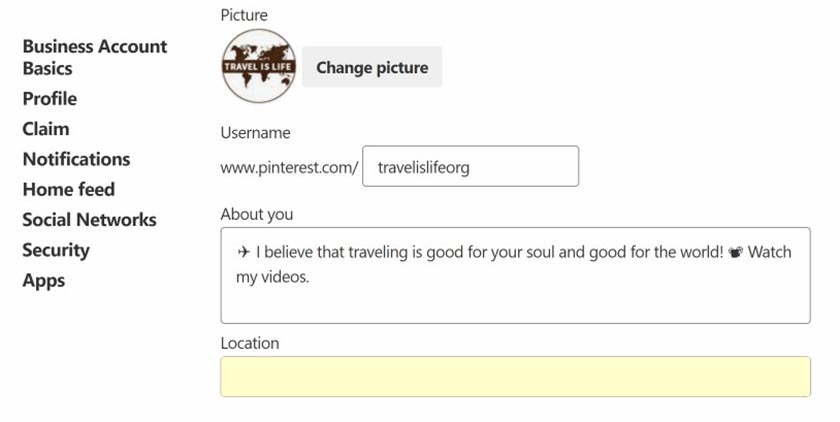
1. Use a descriptive profile name with keywords relating to your niche.
Here's a screenshot of my profile below (or you can click that link to view it).

I don't do the best job at including keywords because I prefer cleanliness over keyword stuffing, and I take for granted that the name of my website already includes the word “Travel” – but if yours doesn't, it may be a good idea to include a few descriptive words. Here are a few examples.
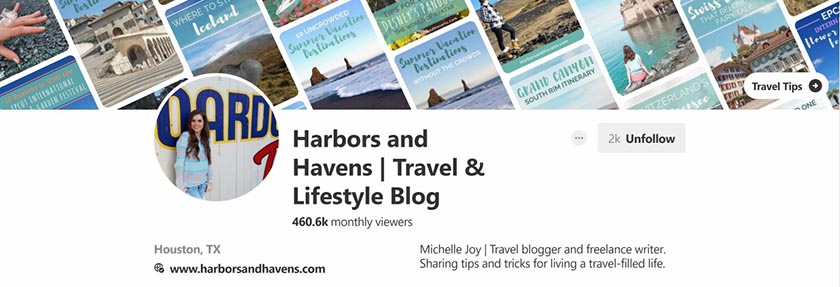
Michelle Joy includes the description “Travel & Lifestyle Blog” after her brand name “Harbors & Havens” because by itself, her blog name doesn't scream TRAVEL BLOG. Her description throws a few keywords into the mix and also accurately describes what visitors are about to see on her profile – which are both good things.
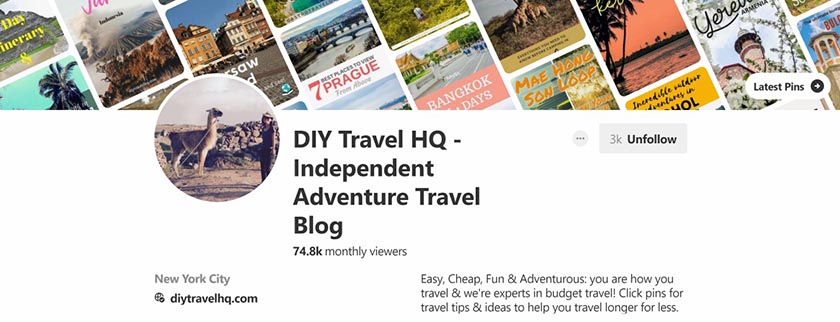
DIY Travel HQ is pretty self explanatory as to what it is (which means a good choice of blog name in my opinion) but Sheena and Erik go one step further in describing their brand by adding “Independent Adventure Travel Blog” after their name.
Mike Hulleman's name “Hobo with a Laptop” is a great name brand, but it isn't the most search engine friendly name when it comes to attracting his target audience of digital nomads. Adding “Digital Nomad Lifestyle Blog” adds an accurate and search friendly description to his profile name.

2. Write a description that's short, to the point, and includes a call to action.
For example in my profile description I wrote, “✈ I believe that traveling is good for your soul and good for the world! 📽 Watch my videos.” I like to include a reasonable amount of emojis because I think they are attention grabbing. My call to action is to watch my videos.
Take a look at the screenshot examples of profiles from #1 also, because I intentionally chose examples of Pinterest users who did a great job with their profile names and descriptions so that you'd have some good inspiration to pull from.
3. Upload a profile image.
This item should go without saying and chances are you've already added your profile image – but if not, do so now. Remember that the profile image is going to be cropped into a circle, so take that into consideration when choosing your photo. If you have a square or rectangle logo, be sure to leave enough white space around the logo so that the edges aren't cropped off.
Some bloggers have said that using headshots that include your face in the photo are more appealing than using a logo – but I don't know if that's true or just anecdotal. I think it's important to have a consistent and recognizable online presence across all your social platforms – which is why I use my logo – but do what's best, most relevant, and most comfortable for you.
4. Include the URL to your website or blog.
I link to my homepage because my videos are front and center – and my videos are the most important thing on my site that I want visitors to view at the moment. You on the other hand may want to link to a specific page or post on your website instead. For example, if your intention is to generate e-mail sign-ups, get people to download your ebook, or view your most popular post, you should link directly to it. At some point in the future, I'm going to build a landing page for Pinterest users to visit from my profile that specifically welcomes them and speaks to them directly – but hey, that's not a basic tactic. This post today only covers the basics.
5. Claim your website URL.
Claiming your website allows you to get attribution and analytics for your blog's content which may already be on Pinterest if other people have previously shared it. Going through the process of claiming your URL allows you to see where your content already exists on Pinterest and view analytics like views, clicks, and traffic for future Pins that you share. Here are instructions on how to claim your URL on Pinterest.
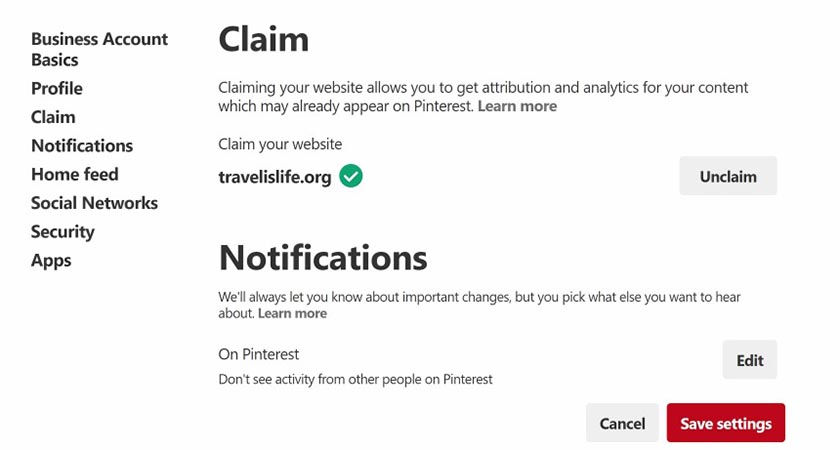
You begin the process here in your Pinterest settings and then verify that you own the domain either adding some HTML code to the section of your website or uploading an HTML file. This process proves that you have access to edit your website and therefore it belongs to you. After you verify your domain, you can view your Pinterest Analytics and have better grasp of who's sharing / visiting your website on Pinterest – although you may need to give Pinterest a few days to start collecting data before there's anything to see.
6. Add a location (if that works for your blog).
I travel full time and have lived out of Airbnbs for the past 5 years, so I don't list a location in my profile, mostly because I'm too lazy to go in and update it when I move. My travel blog also isn't about one particular location. However, if your travel blog is focused on a particular area, you should include your location which will help your profile get discovered in search results. If not, you can always list your temporary location and update it on occasion, or skip this part all together.
✯ Pinterest Boards: Best Practices
Next we're going to talk about how to get started with Pinterest boards when you're starting from none. This section will help ensure that your profile looks complete and that you look like an active Pinner which will earn you more followers.
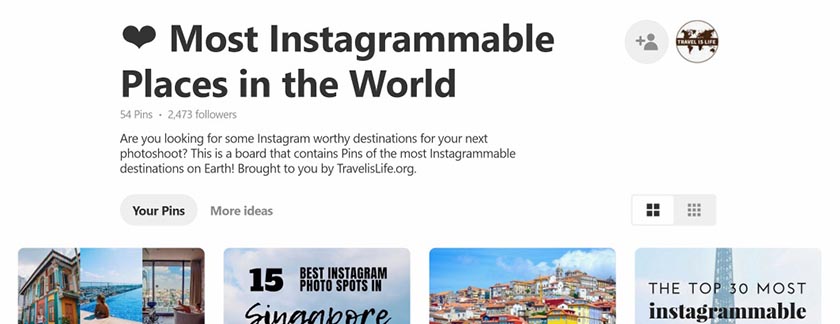
7. Create a featured board exclusively for your Pins.
A featured board appears at the top of your profile and highlights the Pins just from your website. This allows visitors to find your most important posts right away. Some bloggers create multiple featured boards divided by category – but if you're just starting out, creating at least one general featured board for all your best posts is advised.
Here's my featured board for Travel is Life posts:
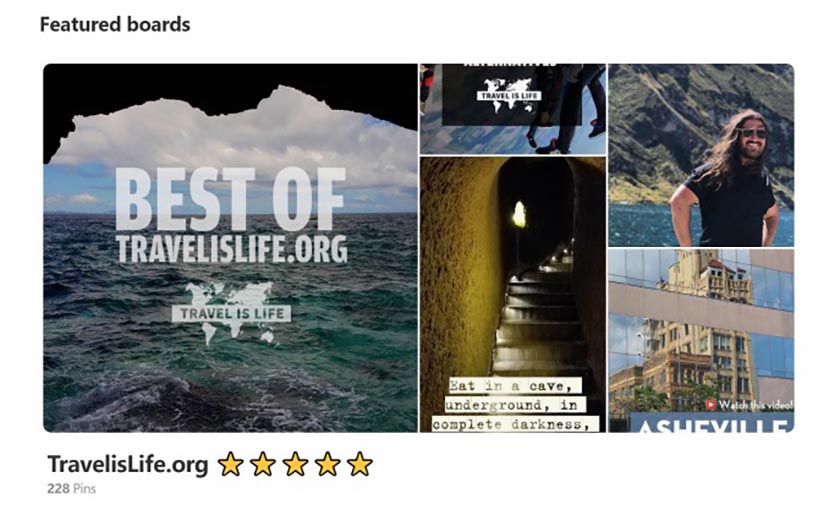
To create a featured board, go to your Pinterest Settings, then click “Edit” next to “Featured Boards” under the profile section. You can choose up to 5 of your boards to feature in the showcase at the top of your profile.
FYI – You may not want to always START each Pin of yours on this board, but you eventually want to Pin each post from your website to this board (or at least your best ones). To explain that even further – every pin starts somewhere (ie: the original board it's pinned to) – and then is repinned from there to other boards. This gives that original pin some tractions (ie: re-pins) and increases its chances of appearing in search results because it's considered popular. It also helps bring attention to the boards themselves because boards that get a lot of re-pins are also more likely to display in search results.
So for example, I may initially Pin my post on Medellin Colombia for Digital Nomads to my ✫ Travel South America board first and then later reshare that pin to my featured board, digital nomad board, and any other relevant group boards. However the initial traction started on the ✫ Travel South America board which is good for that board.
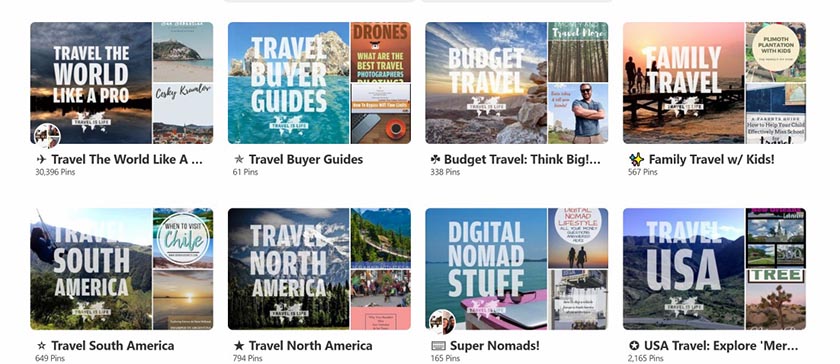
8. Create 5-10 boards that are relevant to your niche.
Immediately create 5-10 boards specific to your niche and then fill them with 20+ pins (from other people) right away. This helps your Pinterest profile look active from the get-go. Don't let anyone, even your first visitors, see an empty profile. I talk more about best practices for creating Pinterest boards below.
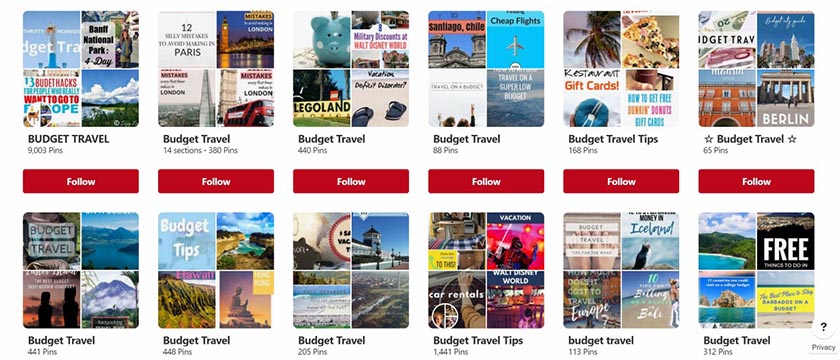
9. Write search friendly titles for your boards that include relevant keywords, but also add some flair.
Obviously you want to include relevant descriptive keywords in your board titles, but don't stop there because that's boring. Create a board name that people can remember and differentiate between other similar boards. For example, look at how many boards are called “Budget Travel”.
Rather than just call my board “Budget Travel” too and stop there, I added a little flair to my board title which you can see below:
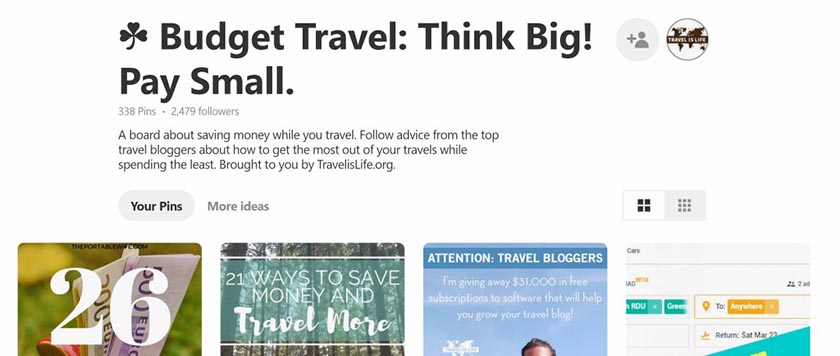
This title helps the board stand out in search results and also helps me not be just another travel Pinterest account.
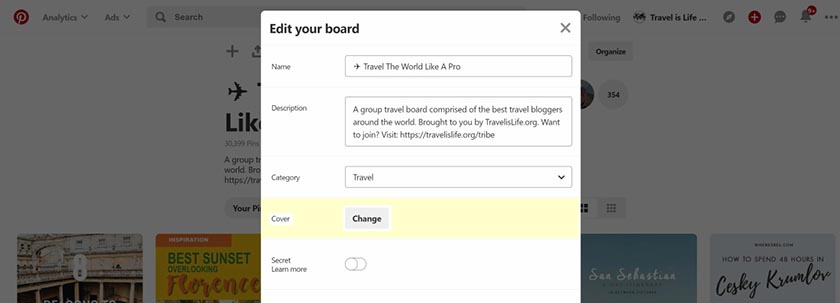
10. Write board descriptions that are accurate, to the point, and include your URL.
My board descriptions aren't the most creative, but they get the job done. I try to include a few more keyword search queries in the description, but I don't overdo it. Here are examples of descriptions from two of my boards. You can see that I end each board description the same way with, “Brought to you by TravelisLife.org.”

11. Create cover images for your boards.
Cover images are the graphics which appear in the thumbnails when people browse your boards. I created a template a while back that I use for all of my board cover images which you can see below:
To create a board cover image, first I upload the Pin using the “Create a Pin” option in the upper right menu. For website URL, I input my homepage or a most relevant category page on my site, and I copy/paste my board description as the pin description.
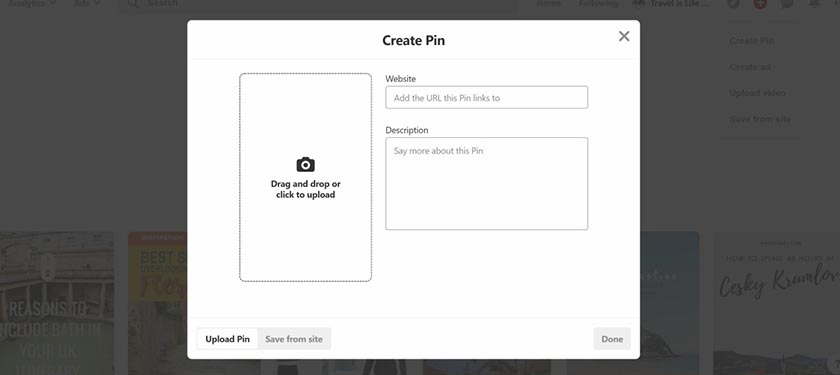
After I save the image as a Pin, I go into my board settings, choose “Change” in the Cover settings, and select my new image.
Is this a basic or advanced Pinterest strategy? I was hesitant to include cover images on the list because this post is for brand spanking new beginners, but I decided to because you may have seen this on other profiles and wondered how it's done. However, my caveat to this item is that creating cover images for your boards isn't really necessary. It cleans up your boards, adds a level of professionality, and makes your profile look nice, but if you were to skip one item on this list – skip this one. You can always go back in the future and make cover images then, after you've had a chance to learn more about Pinterest and decide which boards you'd like to keep and which you'd like to remove. You're not going to get your boards right from day one – and that's okay – so perhaps hold off on creating board images for a while.
❤ Pinterest Pins: Best Practices
Now we're going to talk about the Pins themselves – which may be the most important section. After all, more people are going to be viewing your Pins than your profile, so it's important to get this right from the beginning. Your success on Pinterest depends on your Pins.
12. Only create vertical pins, ever.
The recommended dimensions ratio for Pins is 2:3 – or in other words – 600 pixels (wide) by 900 pixels (tall). Canva, the popular online tool for creating Pins, recommends 735 x 1102 px as the ideal Pin size, but either way the 2:3 ratio proves right. The days of doing super crazy long infographic Pins on Pinterest are over – and now Pinterest themselves highly recommend the 2:3 ratio for optimal exposure.
This means that you should NEVER, NEVER, NEVER, create square or God-forbid landscape Pins! My exact words to Amber when I saw her first two landscape pins were, “Neither of those will fly in the tribe. They've got to be vertical-only (typically the 600 x 900 pixel proportions or taller). Our tribe is heavily moderated and we've got strict rules in order to keep it the “Best Travel Tailwind Tribe” – but most tribes and group boards in general want vertical pins only.”
And the advice I gave to Amber is true for you as well. No-one is going to reshare your square or horizontal pins, and many group boards and tribes will kick you out for posting them. That's why, from day one, you should only ever create vertical pins that stick to the 2:3 size ratio.
NOTE: This is not entirely true of photography specific boards which don't allow text in your pins – you'll find a lot of square and horizontal photos on them. There's a different set of etiquette for those types of boards. I'm referring to when you create pins specifically for your blog posts – VERTICAL ONLY!
13. Include the title of your post (or a similar variation) in your Pin.
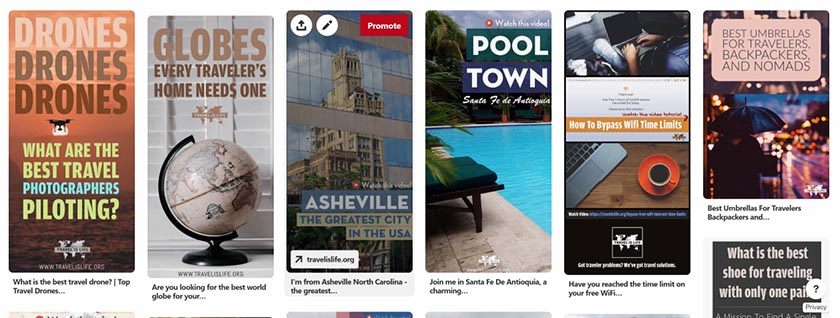
If you're just pinning your photography, this isn't true, but if you're creating Pins to promote your blog posts, then you should always include the title of your post in the Pin image itself. Pinterest is a very visual search engine and they practically hide the post title below the Pin, so you can't rely on that title to drive rePins and traffic to your site. See an example below of Pinterest search results:

Most people, including myself, pay full attention to the Pin images and not the title below the Pin when looking for information or for Pins to reshare. That's why you should always include the title of your post within the pin itself – or your valuable posts are going to get lost in the shuffle.
14. Put your logo in the bottom or top center of the Pin.
This advice came directly from Pinterest a few months ago when a representative was talking about their image recognition algorithm. Here's a video of the full interview that Pinterest's Head of Product Marketing, Sarah Hoople Shere did with Tailwind's Alisa Meredith where this is mentioned. You really don't have to watch the full interview because I include the best of that information in this post, but I like to provide sources for the the things I recommend.
15. Design beautiful attention grabbing Pins with a consistent visual theme.
I may be the worst person in the world to give you design advice, but it needs to be said. Better looking Pins get more attention and more re-pins. You'll have to look elsewhere for specific design tips because I'm not the guy to give them, but below are a few basic design best practices for your Pins. Also follow our tribe's ✈ Travel The World Like A Pro group board where some of the most popular travel bloggers on Pinterest contribute pins. You'll learn a lot from studying their pin designs.
Pin Design Tips:
- Use fonts that are easy to read. Pinterest users will scroll past anything that's too difficult to read.
- This isn't Instagram – so not every Pin has to include you in the photo. I typically make 3 pins per post and I've found that Pins without me in them perform better. You may be a lot better looking than me though so experiment on your own – but be sure to split test between Pins that don't have you in the photo.
- Collages work well – but don't overdo it. Pins initially appear small within search results so be sure that all your photos in the collage are able to be seen clearly even when displayed within a thumbnail.
- Use color palettes that are easy on the eyes. Make sure that your font colors, borders, and backgrounds aren't offensive to the eye.
- Try and have a little consistency between your Pins. This may come in time after you've had a chance to experiment with different Pin styles to see what works for you – but eventually you'd like to have a consistent visual theme to your Pins so that people recognize them as yours.
If you suck at design, perhaps start out using a service like Canva which I mentioned earlier and your Pins will immediately be the right size and you'll have some great looking professional templates to choose from. Eventually you may want to move over to Photoshop and create your own style, but then again, maybe not. Whatever works. If you know of an online tool for creating beautiful pin designs, drop me a comment below this post and I'll add it to this resource. Personally I use Photoshop so I'm not too familiar with many free online tools.
16. Write relevant and descriptive Pin descriptions.
Pinterest is constantly experimenting with how many characters to display in their descriptions, but the maximum number of characters you can include at the time I'm writing this is 500 characters including your hashtags. It's best to include the most important elements of your pin description within the first 194 characters, which is what Pinterest currently displays before you have to click “More” to read the rest of the description. Utilizing the full 500 characters allows you to input additional relevant search queries – but certainly don't keyword stuff. Write natural descriptions that are conversational in tone, and if you can't fill the entire 500 characters, that's fine. Do what comes natural for you when writing the description.
17. Use hashtags in your Pin descriptions, usually at the end.
Years ago you might remember that Pinterest did not pay attention to hashtags and encouraged you to NOT use them in your descriptions. Times have changed and Pinterest made a complete 180 turn this year and now they STRONGLY advise you to use hashtags in your descriptions. They don't recommend a specific number of hashtags to use, but doing between 5-20 hashtags per post is reasonable, similar to how you would on Instagram. Here's an example of one of my newer Pin descriptions.
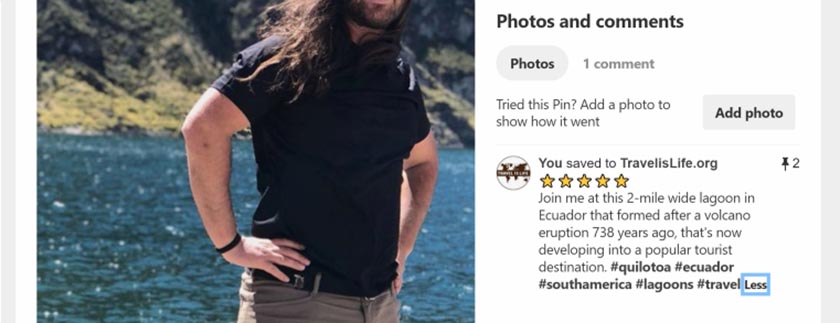
18. Include the location in your pin description and image.
You should make it as easy as possible for other travel bloggers to share your Pins, and we often re-pin images to location specific boards. Never assume that everyone else knows the city, state, country, or continent of the location you're writing about. I hate having to Google search a destination I've never heard of because the blogger was too lazy to include the country or continent in their description. Typically I include all three or four location specific keywords in a description or hashtags: 1) City, 2) State (if USA or a country with states), 3) Country, 4) Continent.
Aside from making it easier for other travel Pinners to share your posts, you're also making it easier for Pinterest to know what your Pin is about. That's why it's best practice to always include the location in your description – and if it works for your design, you may even want to include the location in the Pin image itself. After all, people scrolling through their Pinterest feed aren't necessarily reading your descriptions.
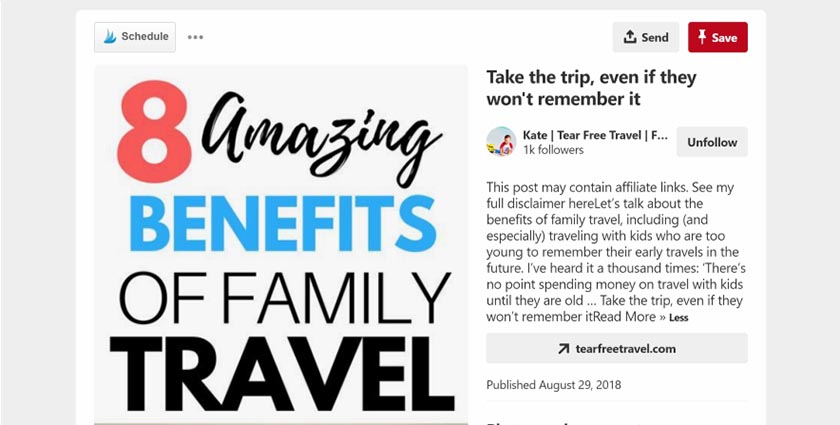
19. Enable Rich Pins for your website.
Rich Pins add extra details to Pins from your website. There are four types of Rich Pins: product, article, app install and recipe. As a travel blogger, you're most interested in the Article Rich Pins which let you show the title, description and author of your article or blog post. Here's an example of an Article Rich Pin being displayed.
Here are instructions from Pinterest about enabling Rich Pins for your site. Your Pins will look a lot better and entice more people to click when your meta post info is displayed, and it automatically includes more search keywords in your Pins which is good for discovery.
20. Learn from what others are doing right (and wrong).
When I first got started with Pinterest, I did a lot of research and read a few guides, but mostly I looked at what other people were doing – especially profiles in my niche who were successful. I reverse engineered their processes, looked at which group boards they were active on, read the descriptions on their pins and boards, studied their pin designs, etc. I recommend that you do the same. Follow along with my profile @travelislifeorg on Pinterest and also check out our ✈ Travel The World Like A Pro group board where you can learn from some of the best travel bloggers in the world.
📌 Pinning & Scheduling: Best Practices
This section addresses best practices for scheduling your Pins. After I posted this article in our private Facebook group, members recommended that I add this section because the information below may not be obvious if you're brand new to Pinterest.
21. Consistency is crucial. Pin or schedule at least 5-10 pins per day.
Pinterest says that consistency is crucial to growing your Pinterest presence, and they recommend pinning at least 5-10 pins daily to keep your profile active. Consistently pinning smaller quantities of pins every day or several times per week is better than pinning large quantities of pins infrequently. This is why most members of Travel is Life Creators use a software called Tailwind App to schedule and post our pins. The app allows you to add Pins to your queue and schedule as many as you'd like to pin throughout the day. So for example, once a week I add 100 pins to my Tailwind queue and the software automatically pins 10-15 pins per day for me. I can set the quantity of pins per day to any number I'd like. Tailwind makes consistent pinning a lot easier because otherwise I'd have to login every day – which I'd never do.
This advice about consistent pinning isn't to say that you can't pin large quantities of pins in a single day – you can do that too – but it's better to at least pin a few each day too. I do a combination of both, which means that I have 10-20 pins consistently being pinned every day through Tailwind, but every couple weeks, I'll login in and manually add a whole bunch of pins to my boards. So on that particular day, I'll manually add 100+ pins to my boards, but I'm still pinning consistently each day too.
🖊️ Blog Post: Best Practices
This last section talks about best practices for your blog itself and integrating Pinterest plugins into your website and displaying pins on your posts.
22. Embed your pins at the bottom of your blog posts.
It's important to display your Pins somewhere in your blog post because it makes it easier for visitors to pin your posts. You can see how I display my pins at the bottom of this post. There are two ways to add Pins to your blog posts.
1) The first way is to upload the images directly to your blog and add them to your post. This is what I do. The images are hosted on your website and visitors pin them directly from your site onto Pinterest. It's the same process as if you were adding any other image to your blog post.
Using this first method, your Pin Description is not part of the image by default. Despite what other people may tell you, you should NEVER put your long pin description into the ALT tag of your image. This gets advanced, but read my blog post about Alt Attribute vs Data Pin Description for more information. In a nutshell, the Alt tag is for Google and should be short, like 16-20 characters max, and exactly describe your image. Your Pin Description is for Pinterest and can be up to 500 characters. You can manually input your Data Pin Description into the HTML of your image via the instructions on that post I just linked to, or you can use a plugin like WP Tasty Pins to do the job for you. I don't use this plugin personally because I manually insert the code via HTML, but it was recommended to me by Mary Jo Manzanares who uses it on her website Traveling with MJ.
2) The second way is to upload the images directly to Pinterest, and then embed the Pin code onto your website, similar to how you would embed a YouTube video. You can create the embed code for you Pin on their Widget Builder page, or alternatively by clicking the Menu–>Embed option on the pin itself.
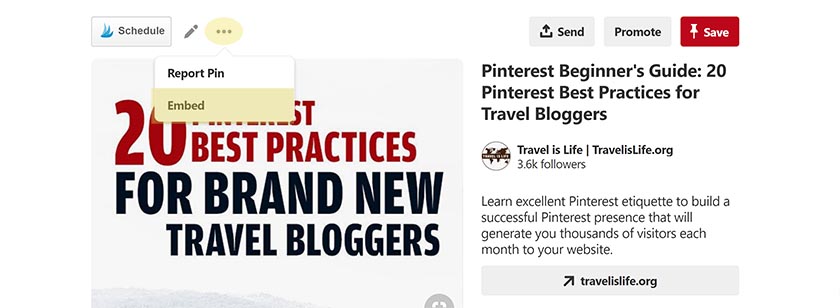
If you copy paste the embed code into your blog post (make sure you're in Text mode and not Visual mode in your post editor), then your embedded pin will look something like this:
23. Install a Pinterest sharing plugin on your blog.
You want to make it easy for people to share your blog posts and images on Pinterest, so you should install a Pinterest sharing plugin. I use Social Warfare Plugin on my blog, which you can see in action at the bottom of this post. (It's the bar with the social icons that goes across the bottom.)
There are a ton of other Pinterest specific plugins out there too, some which will put a Pin It button on your images themselves when a visitor hovers on top of them. For example, the WP Tasty Pins plugin I mentioned earlier will do that. I don't like those Pin It buttons hovering on top of my images because I don't want the button on ALL of my images, so I prefer a more general sharing plugin like Social Warfare, but you do what's best for you. Regardless of what you do, you'll get more Pinterest shares if you make it easy for people to share your posts, so take that into consideration.
☀ Conclusion
After you've completed the above checklist, you'll be ready to start Marketing Your Travel Blog on Pinterest. Most people in the Travel is Life Creators community, including myself, use Tailwind to schedule and post our Pins, and we're members of Tailwind Tribes, which are a reciprocal form of Pin sharing. We also join group boards and participate in reciprocal sharing groups on Facebook.
You can learn more about these things in the Pinterest marketing article I linked to above – but it's important to have a solid grasp of the best practices in this article before attempting to join group boards or Tailwind tribes. Your success rate at joining these groups will be much higher if moderators see that you practice good Pinterest etiquette and follow the best practices described in this post.
☑ What'd I miss?
What other important Pinterest best practices did I not include in this article? Drop a comment below with your suggestions. Alternatively, if you disagree with anything I wrote, please speak up. Your feedback and input is appreciated by myself and everyone reading this post.
UPDATE: You'll notice that this list already contains more than the 20 Best Pinterest Practices originally published, and that's because I've taken the feedback of experienced Pinterest users and updated this post with their advice. I will continue to do so as I'm given additional feedback and suggestions. Thank you for your help.
⭐️ Additional Resources
How To Hire A Pinterest VA For Your Travel Blog – I interviewed leading Pinterest VAs and learned their strategies and workflow to help you successfully outsource your Pinterest marketing.
Travel Blogger Success Kit – These are free resources that I've created to help travel bloggers grow their online presence. I cover topics like SEO, WordPress, vlogging, and more.
Internet Crash Courses – This is an educational platform that I created with travel bloggers in mind – but all bloggers can benefit from the information. I offer new courses on different subjects every week. You'll especially love it if you're new to blogging or looking to grow and monetize your online presence.
✏ Pin This Resource
Love this post and want to share it to your favorite travel blogging or marketing boards? Use my special Pinterest friendly graphics below!

I’ve been experimenting with different pins. We have our branded set (which I need to start adding our logo to) and I’ve been using someone on fiverr to make an alternate set of pins for boards that might not love our branded style. It seems to work. For as much as I want to get our branding out there, I know we might be a little bold for some people’s tastes, so at this point, I’m happy to drive traffic to our site any way possible. It’s also interesting to see which pin designs catch and which don’t.
Do you see any problem with this practice, or do you think all of our pins should be branded? Or maybe alternate designs but with our logo? Curious about your thoughts.
Thanks.
Hi Trina – I’ve never heard of anyone doing that before (creating a branded and unbranded set of pins). That’s a really interesting idea. Split testing of any kind is never a bad idea. I always feel that my designs are too bold when I see softer designs doing real well on Pinterest. I’m just not a great designer and am making these pins myself. You make me want to experiment with hiring a designer to create a second set of Pins and try it myself.
I don’t see any problem with the practice. I think it’s an interesting idea. Is it a good idea? I guess you’ll find out through your data. The name of the game is traffic so who really cares if your pins aren’t plastered with your branding. However, perhaps you can still brand the Fiverr designs but much softer, like just with a “TeamHazardRidesAgain.com” in white letters across the bottom of your pin.
How long have you been doing what you described? Long enough to get some analytics on which set of pins are performing best?
Excellent post. Really helpful. Thank you.
Hi Paul,
Travel is definitely is life. I’m a traveler and I really enjoy it especially when I’m doing adventure trips. I love tip #17. It’s really advisable to put the hashtags after the description. Pinterest is my top tool for driving traffic to my website. So cool!
Valerie